Buttonizer is a floating action button for on your WordPress website. I hear you thinking “why should I use Buttonizer?”. The answer is simple, Buttonizer is a new trendy way to boost the amount of interactions and conversations from your website visitors. You can easily style the button by yourself, so it fits the design of your website. In this article I will tell you all about the WhatsApp button and how this precise button will increase the interactions on your website.
Why whatsapp?
WhatsApp has a big audience, they have over 1.5 billion active users over the whole world and they are still growing every day. From all the chat apps that exist is WhatsApp the most popular one, they have the most users Across the Globe. Their audience is huge, and the chance is pretty big that your audience also uses WhatsApp. So, wouldn’t it be great if you had a button on your website where your visitors could send questions directly to you?
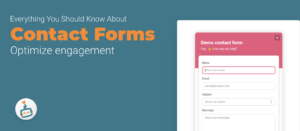
Different ways of contacting
On most websites you have to fill in a contact form if you have a question, we think that that is a bit old-school and not convenient. Chances are that the visitors of your website will leave if they have to fill in a contact form, because it’s lots of work. That is why we invented Buttonizer, asking a question has never been easier!
People are sending messages with WhatsApp every day, so sending a message on WhatsApp is more approachable than sending an email whichis also way more formal. Another benefit of WhatsApp is that the responseis much quicker than the response on an email. The average response time on an email is 90 minutes, but sometimes it even takes companies hours or days to respond. The average response time with text messages is 90 seconds. So, if a client has an urgent question, they are most likely to use something quick as a chat message over a contact form or email. Simply because it takes less time, it’s easy to use and they will get a quicker response back.
What are time schedules, and why you should use it
You probably don’t like it if people send you messages at night, on a day off or when you are on a vacation. We get that, so we made it possible that you can set the times that people can reach you with the button. When you are installing the WhatsApp button, you can go to advanced. There is an option named “Time schedules,” the current schedule will say “show button at all times”. When you click on that you see the option “add time schedule”, you can change the time settings here to your liking.Add specific dates and times to show or hide the WhatsApp button attached to this time schedule. For example, if you are free at Mondays, you can turn the button “trigger me on Monday” off.
The button will disappear from your Buttonizer group at Mondays, so people won’t see theWhatsApp button at that specific day. If you still want your visitors to be able to reach the company while you’re on vacation, then there are two options. You can add another WhatsApp button with the phone number of acolleague for example. Change the time schedule of your button on the dates that you are on vacation or when you have a day of, so the button will disappear on these days. Now you can enjoy your vacation, without thinking about work. Then change the time schedule on the WhatsApp button with the phone number of yourcolleague to the days that he or she can be reached. I personally think that this is the best option, because you can match the button of you and your colleague to each other’s work week, so there is always someone available. For example, if you are free at Mondays, then people can reach your colleague and the other way around. It’s that simple! The other option is that you can change the phone number in the settings of your button, so you don’t have to make another button. Are you really dedicated, and you want your visitors to be able to reach you 24/7? Well that’s also possible, just leave the button on “show button at all times.”
How to install the WhatsApp button with Buttonizer
Buttonizer may seems difficult at the beginning, but so does everything you haven’t seen before. Buttonizer is very user friendly and if you have any questions, don’t hesitate and ask thecustomer support! I’m going to explain how you install the WhatsApp button in this article. We also made a tutorial video; you can find this video at our YouTube channel.
Installing a WhatsApp button
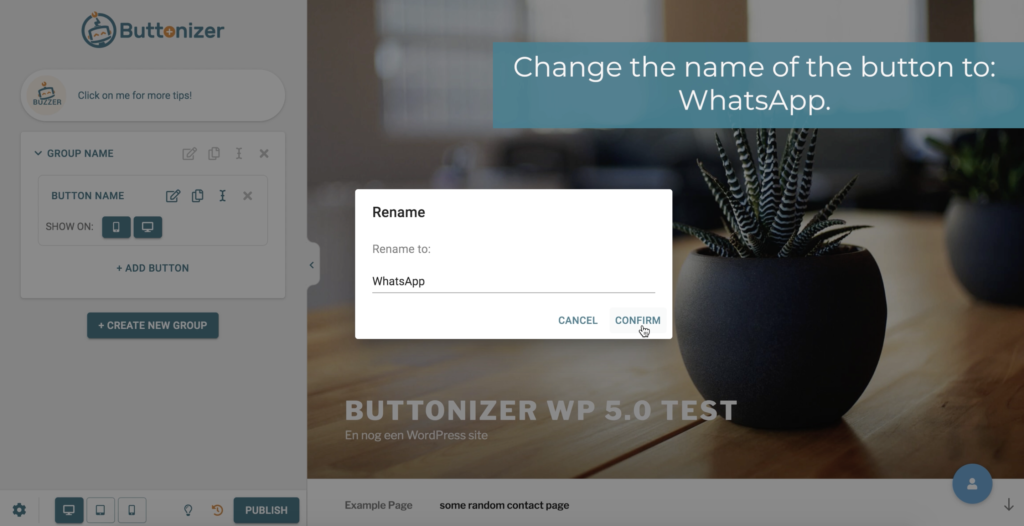
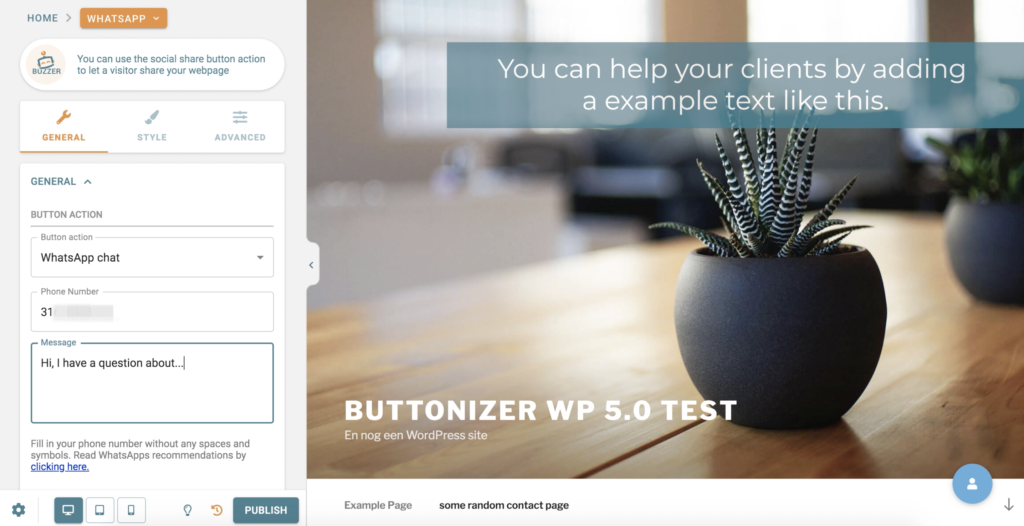
Add a new button and change the name to WhatsApp. Next to the word WhatsApp you see a little square with a pencil in it, click on this icon. Now you can change the button style.
It’s important to change the button action, because this will affect how the button functions. If you want to install a WhatsApp button you choose “WhatsApp chat.” Now you can add your phone number, this is the number were people can reach you. You can also add a message to help your customers. sometimes people need a little help, you can help them by giving them with a sample message. In the video I used “Hi, I have a question about…”, this way people can fill in their question on the dots. It will be faster for them and it is easier if you have customers that for example have difficulties speaking English. If you scroll down at general, you see the option “label.” The label is the text you see next to the button. A text that you could use for a WhatsApp button is “Let’s chat!”
Different button styles
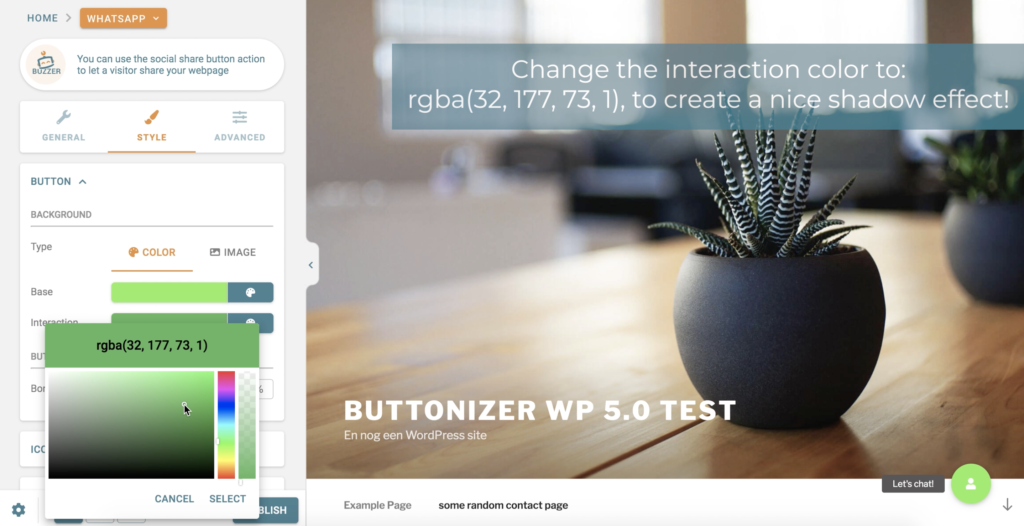
Now were going to change the style of the button, this is important to create recognition. WhatsApp can be recognized by the green colour, so we change the base colour to: rgba(72, 220, 90, 1). To create a nice interaction, we use a darker green to make a shadow effect. Change the interaction colour to: rgba(67, 163, 34, 1). Now if you go over the WhatsApp button you can see the interaction effect that we’ve created. In this case I am going to leave the border radius at 58%. The border radius creates the shape of the button, so if you change this to 0%, you’ll see that it has changed to a square. You can choose whatever shape you like and what fits best to the design of your website.
The WhatsApp icon
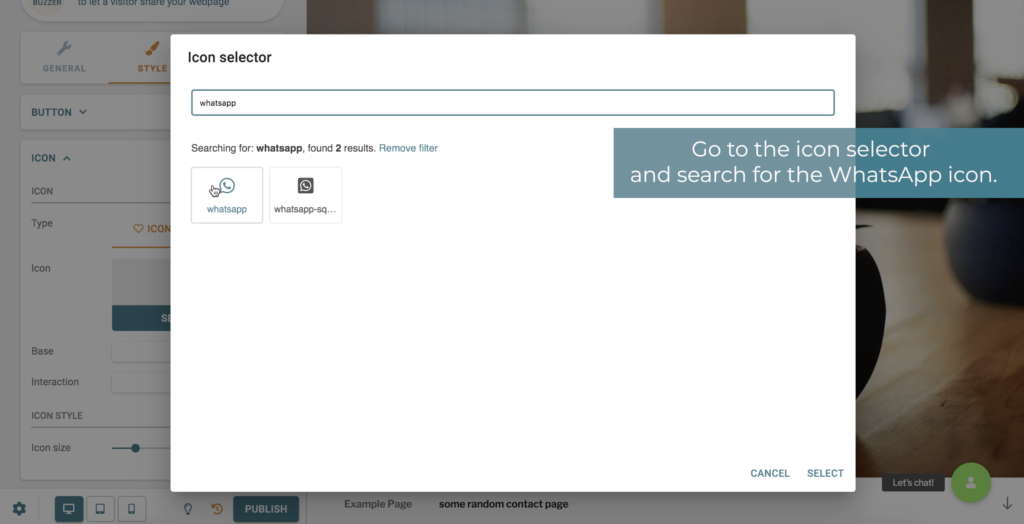
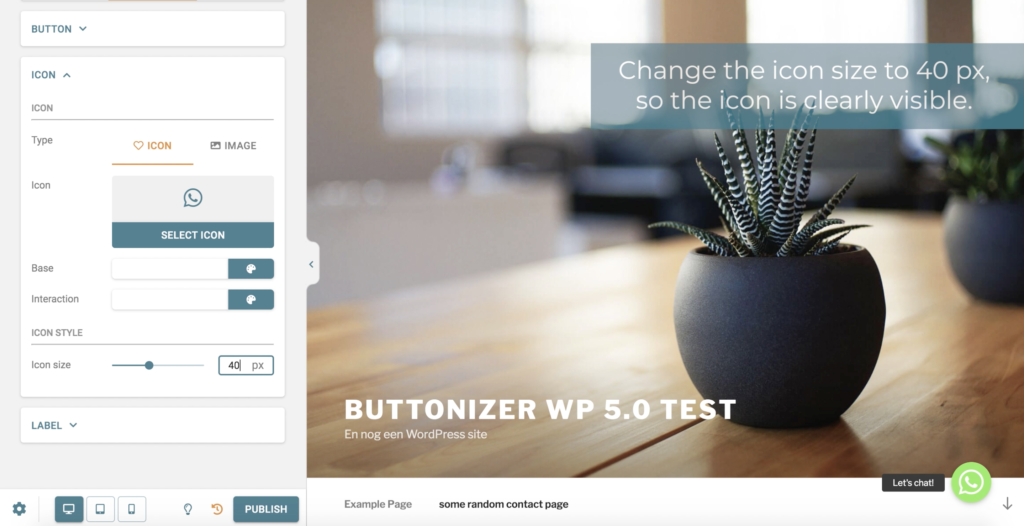
Click on “select icon” and search for the WhatsApp icon. You can use the searcher or just scroll all the way down to the “w” because the icons are in alphabetical order. You can also change the colours of the icon here, I left them on white, but you can choose whatever colour you like. Then I changed the Icon size to 40px, now the icon is clearly visible.
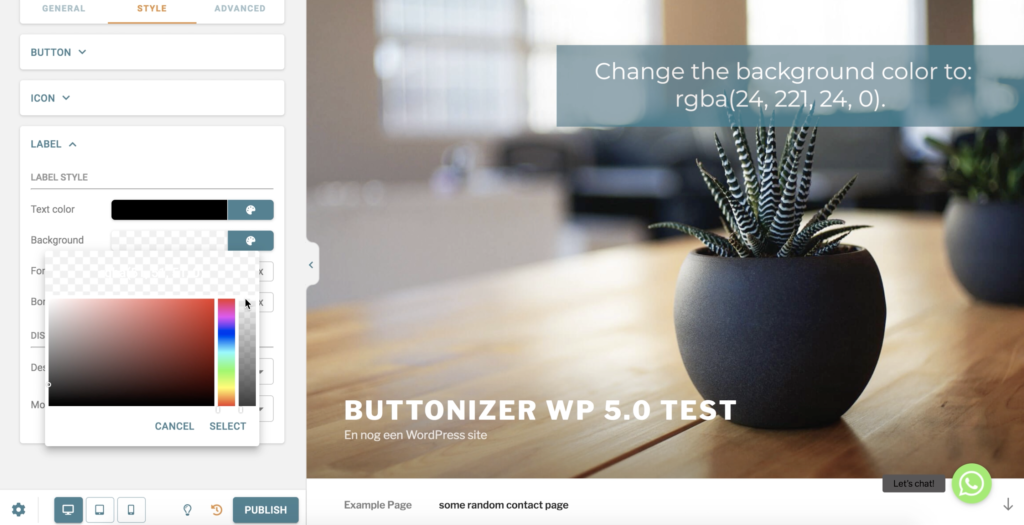
Change the label style to your liking
The label automatically adds a grey background around the text. You can give this background different colours and you can change the shape of the border by the “border radius.” If you prefer not to have a border you can make it invisible. Go to “background” and choose the bar on the right with the grey and white squares till it says: rgba(24, 221, 24, 0). Now that your label doesn’t have a background anymore your text probably isn’t readable, so change the colour to black or any other colour that is visible on your website. The colour that I used is rgba(2, 2, 2, 1). The font automatically chances to the font that you use on your website, so you don’t have to worry about what font you should use.
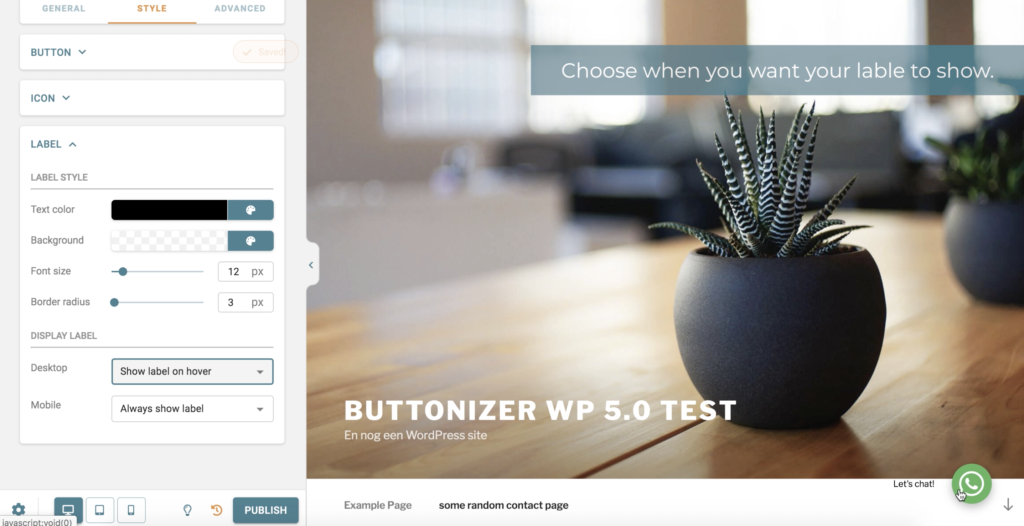
Show or hide your label
How do you want to display your label? Do you want your label to show all the time, then you can choose the option “Always show label.” Or do you only want your label to show when someone is going over the button with their mouse? Then you should choose the option “Show label on hover.” You can also hide the label if you don’t want a label at all. Tip: choose “Show label on hover” or make the background of the label invisible. This way the button has a more calm appearance.
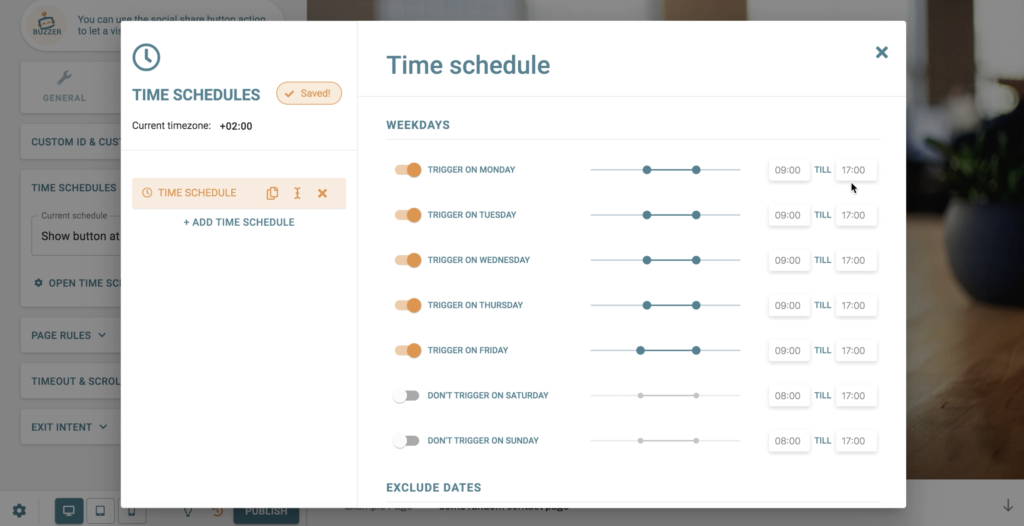
Time schedules
If you don’t want your button to show at all times you open the time schedule settings. You can change the time and days that people can or can’t reach you. Are you free on Mondays and you don’t want people to beable to send a WhatsApp message to you? Click on the orange button, it now says “Don’t trigger on Monday.” You can also add specific times that people can reach you. Maybe you just want people to be able to text you between 10:00 and 17:00 o’clock. You can fill in the times that you want tobe reached on the right.
Page rules
You can dynamically show or hide your button with the page rules. So, you use the page rules if you want button groups or single buttons to show or hide on specific pages. Now you have to decide where and when you want the WhatsApp button to show. The WhatsApp button is great to show at the contact page of your website, but you can also choose to show the button at all times. Every business and website has different needs, so think this through.
Timeout & scroll
The timeout and scroll feature is very important, because you can increase conversions with this specific feature. There are three different components: the timeout, scroll and exit intent.
Timeout:
After how many minutes do you want Buttonizer to show on your website?If you show Buttonizer a couple seconds after your clients open the website it will draw more attention to it. This is very important, because this will increase the conversions! This is also great to use for your WhatsApp button!
Scroll:
You can decide when Buttonizer will be shown on your website when your customer is scrolling down. The button shows itself when the customer scrolls trough the website. Choose wisely where and when the button will pop up.
Exit intent:
You can add an animation to show when the website visitor is inactive or isgoing to leave the website. So, when the visitor moves his hover to the leftcorner (Apple) or to the rightcorner (Windows) to leave the website, an ‘exit intent’ will pop up. This way the customer will probably stay on your website, because he or she is interested again.
Why customizing Buttonizer is so important:
You probably installed Buttonizer on your website because we promise youmore conversions. But those conversions only happen if you use Buttonizer the correct way. You probably worked hard on your website to make a perfect design. It’s very important to change the design of the buttons to the design of your website. This way your website looks put together and clean. TIP: use the colors that you used on the website. You can also upload over 10000 of our icons, or you can easily upload your own icons! So if you are a graphic designer and you want your Buttonizer to be unique? Then you should definitely design your own icons, it looks great and it is fun to make!
Share your creations on our socials, we love to see all of your creations!