Is your website meant to promote an upcoming or periodic event? Then Buttonizer will be of great help. How you ask? Simply by adding an eye-catching action button at the bottom-right corner your (mobile) website. By doing so, visitors can easily navigate through your website without having to jump through multiple hoops.
Want to generate more ticket sales? Simply add an action button that redirects the visitor to the relevant page. Want to keep your (potential) attendees up-to-date on the latest news? Gather more subscribers for your newsletter by triggering a pop-up. Last but not least, allow your visitors to share your website with others through the press of a button.
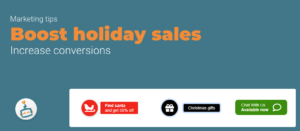
Most used action buttons for company websites
Here is a list of our recommended action buttons for company websites.
- Ticket sale
- Newsletter sign up
- Social sharing
How to set-up your action buttons
Let’s start with the basics and open the Buttonizer editor window. Click on Add button + to, you guessed it, add a new button. Select which action you want to assign to the button. Add the necessary credentials, URL or ID to your button in order to configure it. Finish it off by styling your button (color, position, icon, label) to match your brand / website.
Here’s a quick tutorial on how to set-up each individual button.
Ticket sale
- Click on Add button + to add a new button.
- Select Website URL in the dropdown menu.
- Enter the URL of the page (section) you’d like to direct your visitors to.
- Select which devices you want the button to be visible on (mobile, desktop).
- Style your button by selecting an icon, color and text label (optional).
Newsletter sign up
- Click on Add button + to add a new button.
- Select Popup in the dropdown menu.
- Enter the popup code or ID of the popup you want to trigger.
- Select which devices you want the button to be visible on (mobile, desktop).
- Style your button by selecting an icon, color and text label (optional).
Social sharing
- Click on Add button + to add a new button.
- Select Social sharing in the dropdown menu.
- Select the social channel you’d like to attach to the button (Facebook, Twitter, LinkedIn, WhatsApp, Pinterest, email and more!).
- Select which devices you want the button to be visible on (mobile, desktop).
- Style your button by selecting an icon, color and text label (optional).
Tip: Let your button trigger an animation and pop open if the visitor is inactive for 2 min. or is intending on closing the browser tab. When editing your button group, click on Advanced settings > Timeout & Scrolls > Exit intent.
Insights Google Analytics
Settings up your buttons is nice, but measuring how they’re being used is even better. The buttons are automatically being tracked in your Google Analytics account in the event section. This way you’ll know which button interacts best with your visitors. Buttonizer automatically detects the Google Analytics tracking code on your website. If you’re tracking your website statistics through Google Tag Manager, you can manually add the Analytics UA code to Buttonizer. To do this simply click on cog wheel in the upper right corner, navigate to Options and select Google Analytics.
Read more about tracking conversions with Google Analytics.